Expense categories are necessary to sort out your spending and make records about it. Without a Premium or Platinum subscription you can create no more than 10 expense categories.
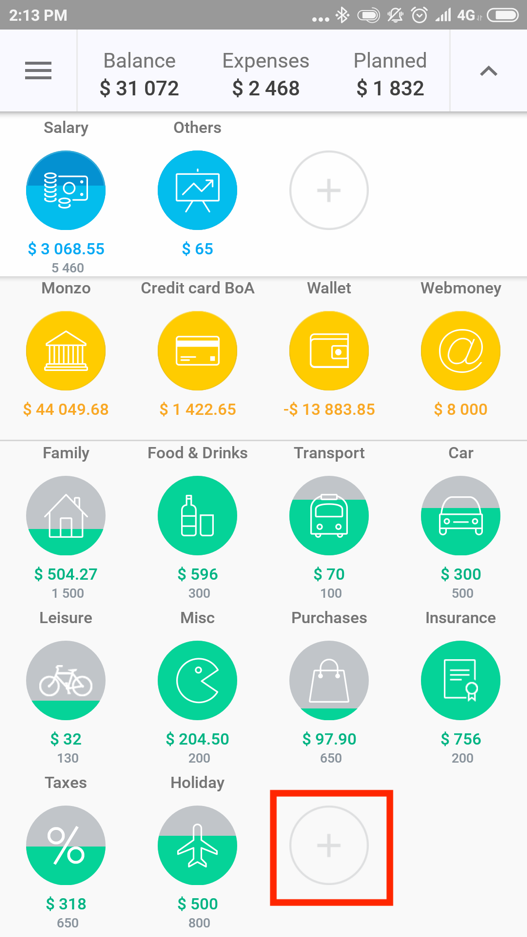
1. On the main screen click on "+" in the block with expense categories (it is under accounts).
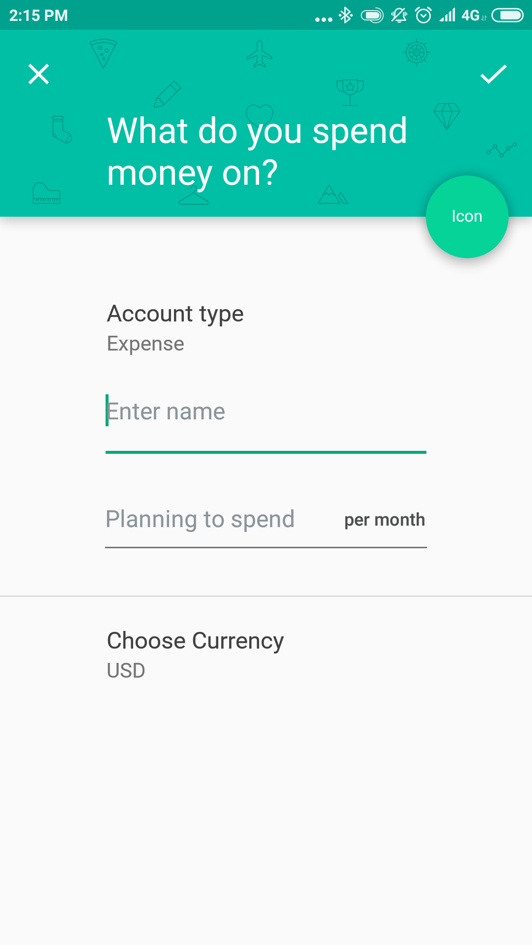
2. Enter the name of a category and choose the currency
You can specify the budget (a limit of expenses) for this category for the current month (or any other reporting period) in the field "Planning to spend". Click on a tick symbol in the right top corner.
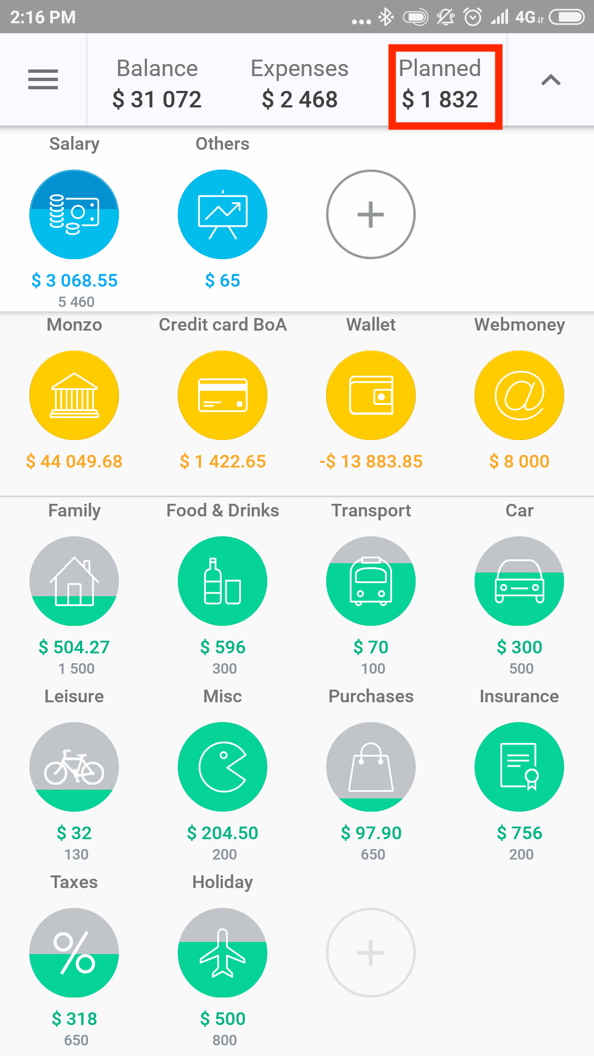
If you set a limit of expenses of a category, its icon will become gray. Then it will gradually begin to fill with color. The more you spend, the higher is the level of the coloring of the icon. At the same time the color of the filling will show you the speed of approaching the limit of expenses:
- Green color means that you spend less, than you might in the current reporting period.
- Orange - that you spend slightly quicker, than you should. If you don’t spend money on this category of expenses too often, then the color of the filling will be yellow.
- If the category is filled red, then you strongly exceed the rate of expenses on this category, or you have already spent all the set limit. The icon in this case will be completely filled with color.
It happens that sometimes you don’t spend money on the category every day but do it once a week. Imagine you spend 25% of the budget of the category for this single purchase. The icon of this category won’t turn red until the number of spending in the current period does not exceed four transactions. Therefore, there will be no signal about an over expenditure.
The sum of all planned expenses on categories minus expenses which you have already made will be displayed on the top of the main screen in the section "Planned".